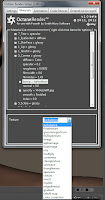
Octane tutorial part 2!
IMPORTANT: this part need some knowledge, not in Octane, but in generally with this kind of software (Poser/Daz, etc).
In this part we will see on how to improve the render time around the eyes, how to do SSS textures (i'll give you a link to the tutorial i've used), etc.
My principal trouble in Octane is located in eyes textures, here's some tips on how to improve them.
14
Go in "Materials" chose "EyeSurface" => change index to 8,
Bump "floattexture" to "turbulence".
15
In Bump change power to 0.01 & scale 10.
16
Let's see the result, better & quicker.
17
Back in Materials, as you can see you're able to reload texture from Poser, let's do it.
18,19,20,21,22
Here's my custom shaders not at all perfect. Just follow.

23
Here's the result
24
Now let's add SSS textures, follow this tuto.
As you see you can export/import all or a part of your materials, it's very usefull when you customize your material & want to use it again without to redo all of your customization.
When you import materials you have 2 choices:
- Keep existing materials
- Replace existing materials
25
Choose the materials you want to import (created before).
26
Materials imported.
27
Let's see the result.
Now let's do a whole scene in Poser!
28
Let's have an eye on the Live DB (i let you see what this DB has).
29
You want to use your material in some others textures ? Just copy it & then paste to all textures you want.
30
When you paste your texture you have the choice to keep the existing image (so you'll just copy the "settings") or used the copied image.
31
Materials copied on my object.
32
Import on a selected material an existing tweaking materials save, here i add a SSS Hair material, i keep existing image, i just want the settings.
33
Select my texture
34
Add the SSS texture on the whole hair model.
35
Go back in Settings, environnment change it to "Image".
36
Select your image (HDRI/IBL).
If you don't have any HDRI here you go:
http://www.hdrlabs.com/sibl/archive.html
37
Now change the resolution => Openviewport, pause your render & click on the screen (see the screen), with he is highlighted that means you can change the resolution of your render.
38
Have a look on settings => resolution, put the resolution wanted.
39
Now adjust the focaldepth. Pause your render, click on the image where you want the focus.
The setting "Aperture" control the "fuziness" 0 mean "no focus", 1 mean "hard focus" (play with this setting to see the impact).
40
Render's done in 13 minutes (you don't have to wait the 12 000/12 000, it's a subjective opinion, if for you your render seems finished, stop it).
Then save.
In this render, i have few minor adjustement (easy to adjust in Poser but didn't noticed before :) ).
Here's the final render
I have accentuated texture in Photoshop, leave few pokes.
Enjoy!
If you have question don't hesitate ask me.


Hi Great Tutorial, I'd like to ask which character did you used for this tutorial ?
ReplyDeleteThank you, model used is Ksenia: http://www.daz3d.com/ksenia-for-v4
DeleteThank you so much for that tutorial! It's great!
ReplyDeleteThanks.
DeleteI've planned to make a 3rd part, i've learnt a lot since this tutorial & some things in this part are useless to do with what i know now.
Any chance of a new tutorial for Octane? I owe everything to your first tutorial! I would love to see some updated instructions for version 2.0! Thanks!
ReplyDelete